It’s easy to get started with an easybell Business SIP Trunk. Here we explain the first steps.
Note: These instructions refer to SIP trunks that you have ordered via www.easybell.com. So far, we only offer SIP trunks in Austria. If you are a customer from Germany, please refer to the help section on easybell.de.
After successfully verifying your address, you will automatically be assigned a SIP trunk and a phone number. You then simply enter the access data into the VoIP-device of your choice and you’re ready to go.
Here are the five steps that help you:
1. Log in to “my easybell”
Visit my.easybell.com and enter your credentials.
If you haven’t already done so, you can now create an account and start testing Business SIP Trunk with just a few clicks.
2. Overview of your SIP Trunks
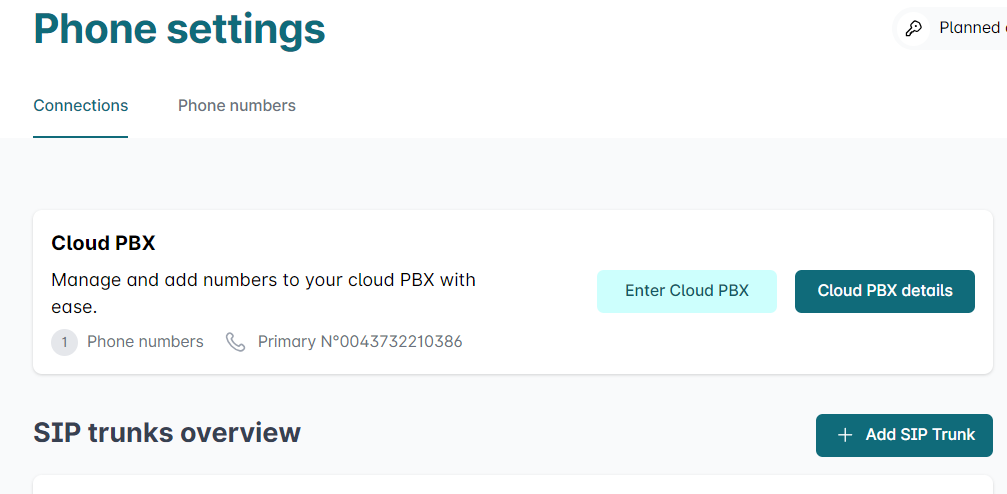
In the phone settings, you can see your SIP Trunks at a glance.
At the beginning, we have already created a SIP trunk for you with one main phone number.
If necessary, you can add more SIP trunks and book phone numbers at any time.
3. Get SIP access data
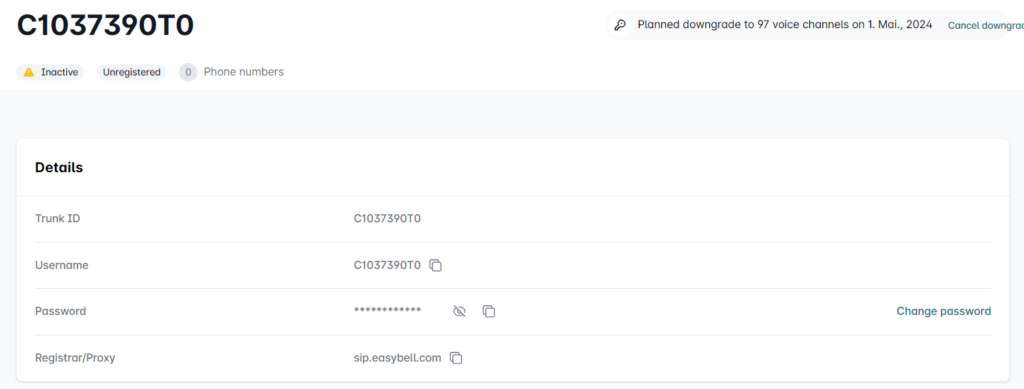
If you click on a SIP trunk, its detail view will open. Right under “Properties” you will find the SIP access data “Username”, “Password” and “Registrar/Proxy”. You can use these credentials in an IP phone or softphone immediately.
Please note, that by default, the main phone number is always signaled.
4. Adjust configuration
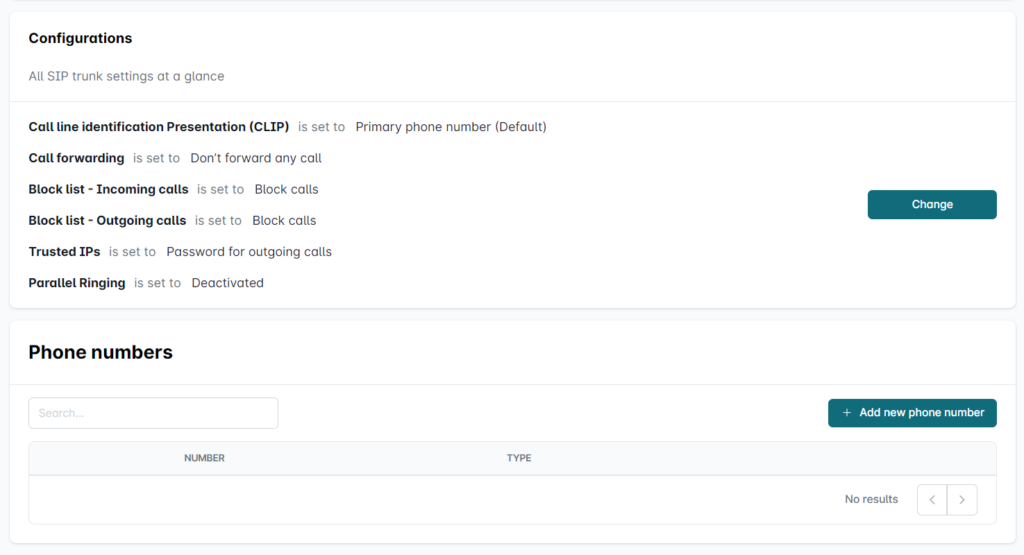
In the “Configuration” area you will see a short summary of the SIP Trunk settings. These are sufficient for a quick start.
But if you want to use a PBX, for example, CLIP no screening is usually used for call number signaling. This is just one of the functions that you can access via “Change”.
Here you can find more information about the various settings:
5. Setting up SIP trunk in devices
To use the easybell Business SIP Trunk, you only need to install the SIP access data in a VoIP-enabled terminal device.
The setup procedure and the designations in the devices are usually very similar, but may differ slightly. If in doubt, please contact the manufacturer or refer to the documentation.
When the device has successfully registered the SIP trunk in our system, you can see this directly in the overview of SIP trunks. From this point on, you can use your phone number(s) for incoming and outgoing calls.


